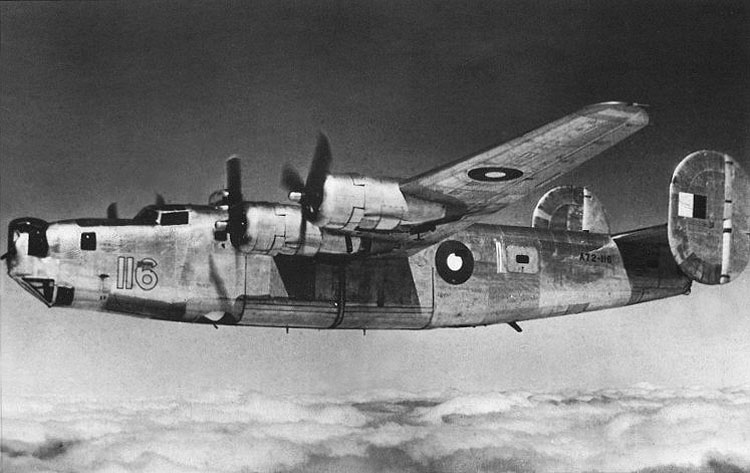
Consolidated B-24 Liberator in RAAF Service
Due to the vast numbers of Liberator aircraft available in 1943 it was decided the Royal Australian Air Force (RAAF) should form up to seven squadrons of Liberator heavy bombers. This would also allow USAAF Bombardment Groups to move from Australia to other areas. As RAAF Squadrons Nos 21, 23 and 24 equipped with Vultee Vengeance dive-bombers had just returned from New Guinea it was decided they should be the first ones to be re-equipped. RAAF aircrews were trained and flew operationally with the USAAF until RAAF Liberators were received in February 1944. The first nine new bombers formed Operational Training Unit No 7.[1]
Unplanned delivery delays meant that Squadrons were not operational until 1945, when they began operations from its base in the Northern Territory forming RAAF Bomber Wing No. 82 .They played a very active role in the heavy bombing role during the last months of the war, particularly in the Borneo campaign. Other RAAF Bomber squadron used the Liberator.
In addition, Nos 200 and 201 Flights flew the Liberator under the direction of the Australian Intelligence Bureau.
200 flight was equipped with 8 B-24s and their operations included dropping “Z-Force” special forces behind enemy lines.
210 flight operated 2 B-24s from Darwin in the Northern Territory conducting electronic countermeasures against Japanese radar and radio communications.
At the war’s end most B-24’s were no longer required and were scrapped for their metal which was then melted down for more urgent use. After the war Liberators were replaced in 1948 by Avro Lincolns. About 287 Liberators (B-24D, B-24J, B-24L and the B-24M models) eventually served in RAAF bomber squadrons. It was the only heavy bomber used in the Pacific by the RAAF and they operated from Australia, Morotai(East Indies) and Palawan (Philippines).
South West Pacific
Governor-General’s Flight RAAF (as a VIP transport)
No. 12 Squadron RAAF
No. 21 Squadron RAAF
No. 23 Squadron RAAF
No. 24 Squadron RAAF
No. 25 Squadron RAAF
No. 99 Squadron RAAF
No. 102 Squadron RAAF
No. 7 Operational Training Unit RAAF
No. 200 Flight RAAF (controlled by the Allied Intelligence Bureau)
No. 201 Flight RAAF
No. 1 Communication Unit RAAF (as a VIP transport)
Europe
No. 10 Squadron RAAF/No. 466 Squadron RAAF began converting to Liberators in mid-1945 after the surrender of Germany, prior to transfer to the Pacific; disbanded in October 1945 after the surrender of Japan.


Detailed Photographs


